We use cookies
We use cookies to ensure you get the best experience on our website. For more information on how we use cookies, please see our cookie policy.
By clicking "Accept", you agree to our use of cookies.
Our cookie policy.
30 minutes
5790 minutes
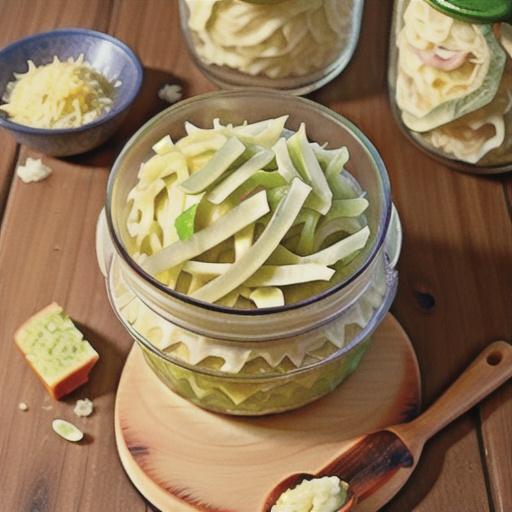
- 1 medium head cabbage (about 3 pounds/1.36kg)
- 15 grams non-iodized salt, plus more if needed (kosher salt, pickling salt, and sea salt all work well)
- Prepare the workspace: Use the largest bowl available for the cabbage and have your salt ready. Aim for 5 grams of salt per pound of cabbage (before shredding).
- Prepare the cabbage by discarding the outermost 2 or 3 leaves. Carefully remove the next 2 or 3 leaves, keeping them as intact as possible. Use a paring knife to trim out the thick center rib of the leaves and set them aside to use later as a cap for the shredded kraut.
- Shred the cabbage: Opt for a chef's knife and cutting board or use a food processor or mandoline slicer. Remove the tough inner core and shred the cabbage as desired for the recipe; focus on technique over quantity.
- Massage or bash shredded cabbage with salt layer by layer in a bowl: Place shredded cabbage in a bowl, sprinkle generously with salt, then work it in either by massaging with your hands or bashing with a wooden sauerkraut stomper. Continue layering cabbage and salt, massaging or bashing each layer vigorously to release moisture. Don't hold back - the more you bruise the cabbage, the better. Add ingredients gradually for easier handling.
- If your tap water has chlorine, set aside approximately 1 cup of it uncovered. This will naturally dechlorinate as the cabbage with salt rests. This water will be used later as a backup to top off the jars with more brine. Take a break for about 30 minutes and let the cabbage release enough juice to submerge the kraut once it’s in the jars. Utilize this time to tidy up dishes or organize your inbox.
- Continue to aggressively crush the cabbage. The mixture will become noticeably wetter. Allow it to rest for an additional 30 minutes before repeating the crushing process. Over time, the cabbage will transform from opaque white to a delicate translucent pale green.
- Taste the cabbage to ensure it's slightly salty. Adjust with more salt if needed. Wash your hands, then use a canning funnel to pack the sauerkraut tightly into jars. Remove air pockets by pressing down while filling, leaving 2 inches of space from the top. If there's excess, use a smaller clean jar.
- Place clean cabbage leaves on top of the sauerkraut in each jar to seal it and prevent air exposure. Use a fermentation weight on top of the cabbage leaf to ensure the cabbage is fully submerged in brine. Press down to remove excess air. Add dechlorinated water if needed.
- Cover and label: Seal the jars tightly. Date each jar or note it down on your calendar. Place the jars in a cool, out-of-the-way spot on the counter with a temperature of 60 to 70°F, give or take a few degrees.
- Monitor the sauerkraut: After 1 day, assess your sauerkraut. Use your senses to observe any changes. Check on it daily, opening the jars to release any gases. Look for small bubbles forming in the brine after a few days. Listen for bubbles by putting your ear close to the jar. Depending on your kitchen temperature, the kraut could be ready in 3 days or up to a week. Be patient and enjoy the fermentation process.
- Once the kraut reaches your desired taste, label it with finish date for future reference. Take out any fermentation weights used. Keep supple cabbage leaves in the jar for later consumption, you can chop them up if desired.
- Chill the jars in the refrigerator for up to 3 months (can extend to 4 with no issue, though I typically enjoy a jar within a few weeks). In the past, sauerkraut was stored in cool root cellars or spring houses, but nowadays, the fridge is the most convenient option. If you enjoyed the recipe, feel free to leave a rating below!
Similar Recipes
- 35min
Toasted Reuben sandwiches
Iconic American deli sandwich from Katz's Deli in NYC.
- 825min
How to Make French Baguettes
Create authentic French baguettes with Chef John's recipe for a taste of Paris at home.
- 25min
How to Make Homemade Tortilla Chips
Make top-notch tortilla chips at home with this versatile recipe - bake, fry, or microwave. Get ready for quick, delicious chips and salsa!
- 5min
How to Make Brown Butter
Elevate dishes with rich, nutty browned butter - a versatile and flavorful addition for pasta, sauces, baked goods, and more. Easy to make at home.
- 15min
How to Make Homemade Butter
Whip up fresh butter in minutes by shaking cold cream in a jar. Perfect for a fun culinary project, especially for kids!